Getting Started with OpenOffice
OpenOffice is an open source documentation suite. It includes things like spreadsheet, presentation and word processing software. It has much of the same functionality as MSOffice but with a much lower price tag. OpenOffice is free and can be downloaded for Windows, Macs or Linux at http://www.openoffice.org/
When you first launch OpenOffice, you’ll probably see a splash screen asking you to pick what type of document that you want to create. Since we are going to be working on a novel you’ll want to pick the Text Document option. This will create a blank document.
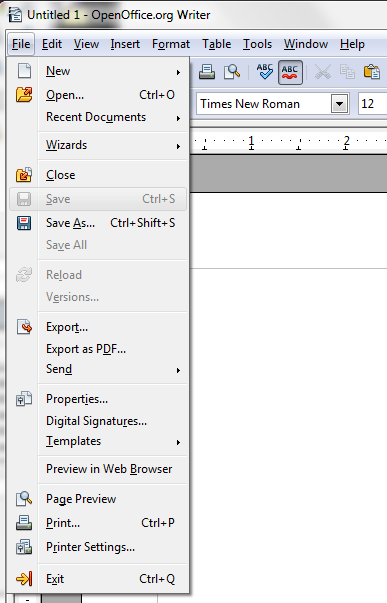
The first thing you should always do is save the blank document with a name. Click on the File menu option and select Save As from the drop down list. Give the file a name like “MyNovel.odt” and click on the SAVE button.
You may wonder why I want you to save the document before adding anything to it. I’m a huge fan of saving files often. Maybe obsessively so, but all it takes is one crash at the wrong time for you to appreciate the value of a recently saved file. Now that you have saved the file with a name it is very easy to save the document as you work on it. Simply press the <CTRL> key and the <S> key at the same time. This will save the document.
Every time I pause in my writing I hit <CTRL><S>. You may not want to save that often, but you should make it a habit of saving frequently.
OpenOffice has tons of cool features, and it is tempting to want to try to use many of them. Don’t. If Saving Frequently is my first rule, then keep it simple is my second.
When you are finished with your novel you’ll want to publish it, and depending on how you publish it you’ll need to convert the document to different versions. By keeping your formatting simple you’ll make this conversion process easier. You want the time spent on converting documents to be measured in hours, not days or weeks.
For a typical novel you only need three styles. One for the chapter titles, one for the story content and one for the spacer that you use between sections of the story. Styles control how that part of the document will look. I suggest three paragraph styles. You may want to use more or even less, but I’ll explain why I think three is the right number.
The title of each chapter should use a Heading style. In fact I use the default “Heading 1” style that comes with OpenOffice. By using the same style for each chapter title I can make sure that they all look the same. If I want to change the way the titles look later it only requires updating the style instead of having to edit each title individually.
OpenOffice will allow you to automatically generate a table of contents for you book from the Heading styles. I know, it’s a novel. Why do we care about a table of contents. For a print book, you probably don’t, but for an ebook the table of contents can help your reader navigate the book if they ever lose their place. I’ll talk more about table of contents later. For now it is enough to remember that one style for the titles allows you to change the look of all titles in one spot.
The body of the book is where your story is told. It is what the readers will see most often. I always create my own body style, but I don’t start from a blank slate. Instead I select the existing Text Body style and copy it to create a new style.
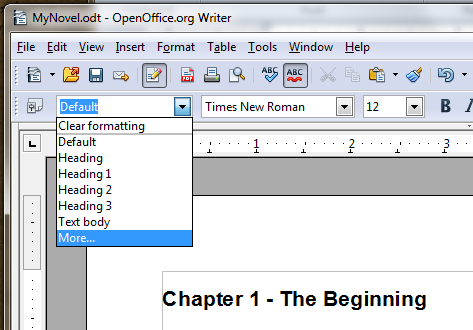
First, display the style pull down list. At the bottom of the list you’ll see a “More….” option. Select the “More…” option to display a list of all styles.
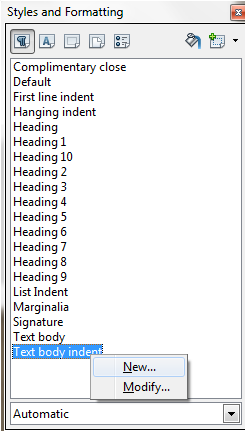
Highlight the Text Body style, right click on it and select “New…” from the list.
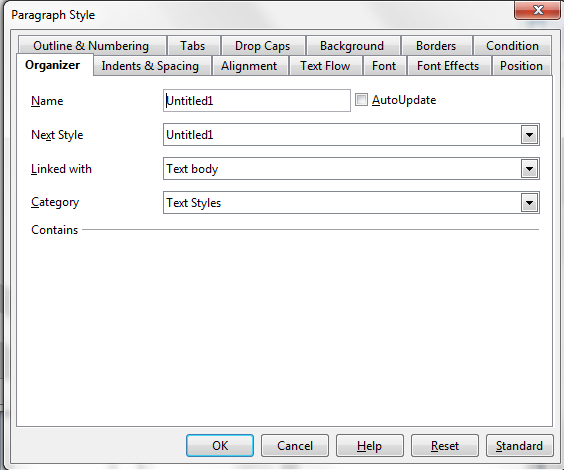
This will display the Paragraph Style edit window with the Organizer tab active. The name will display Unititled1 (or some other number). Change the name to something that makes sense to you. I’ll use BookBody.
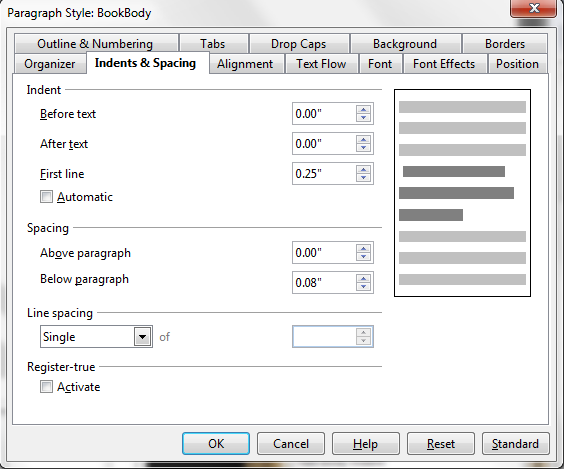
Next select the Indent & Spacing tab. In this tab set the First Line Indent value to 0.25″. The text alignment for this style will be left justified. I normally leave that alone when I’m working on the draft and only change the alignment during the final stages of formatting. I like to search and replace for all occurrences of two spaces and replace it with one space and that works well when left justifying the copy, but not so well when you the text is justified (fills to the left and right margin). Once the changes have been made, press the OK button to save the new style
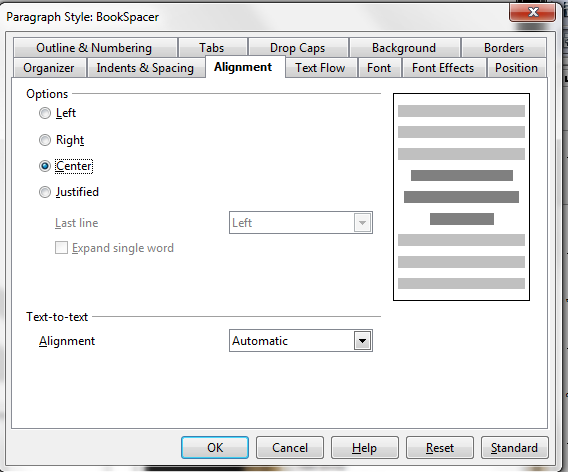
The last style I create is the spacer style. This is nothing more than a copy of the BookBody style with the alignment set to Center. To make the copy, first highlight the BookBody style, right click and select “New…”. In the Organizer tab set the name to BookSpacer, then in the Alignment tab select the Center option.
When you are done, you will have BookBody and BookSpacer in your Styles and Formatting list.
There is one other thing that you should do. In the Styles window, select the Heading 1 style, right click on it and select “Modify…” On the Organizer tab change the Next Style from Text Body to BookBody and then save the change.
Now you can begin writing your story.
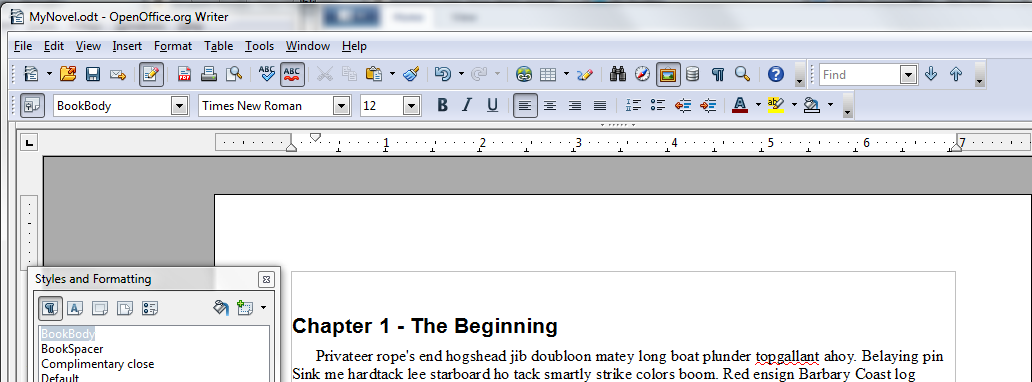
Type the title for your chapter. While the cursor is on the name change the style to Heading 1. Since these are paragraph styles, you don’t have to highlight the entire section. Whatever paragraph is currently active will inherent the formatting.
On the next line begin writing the body of your chapter. Check the style in the top left to make sure that you are using the BookBody style. It should be, but if it isn’t then simply highlight the chapter content that you have written and select the BookBody style from the Styles window.
Each time you press the ENTER key a new paragraph will be created using the BookBody style.
Once you reach the end of your section, you may want to place a section break. Some authors use the hash symbol (###) or even fancy graphics. I use a combination of the dash and the letter o (-o-). Graphics can complicate the ebook creation process and ### characters tell OpenOffice to embed a pair of horizontal rules across the page. Neither are want I want to do.
I use the dash and letter o because they are characters that are available in all fonts and I wanted to avoid the overhead of embedding fonts in the ebook. When publishing an ebook your reader should be able to control what font they want to use when reading the book.
Pick whatever works best for you. Once you enter the character for your section break, be sure to change the style to BookSpacer.
Use the three different styles as you write your story.
In future installments we’ll talk about taking your OpenOffice document and converting it to an HTML file for upload to Amazon KDP and a PDF for upload to CreateSpace


